The Stocktake feature is a powerful tool that allows users to efficiently and accurately scan and verify their assets at different locations using RFID or barcodes. By utilising this feature, users can easily keep track of their assets.
With the Stocktake feature, users have the flexibility to choose between RFID or barcodes for scanning their inventory. RFID technology allows for quick and seamless scanning, while barcodes provide a more traditional scanning method. Regardless of the option chosen, the Stocktake feature ensures that users can easily and accurately update their assets at each location.
Starting a Stocktake
-
Open the Loca.fi App and log in.

-
Tap the Menu icon in the top left of the screen, followed by the Inventory option.


- Tap Select Inventory Location.

- Tap the Search Button to bring up all the options or use the Search Bar to search for the location you are performing the stocktake and tap on the location.
-
 Only one stocktake is allowed to be open at one location. If there is already a stocktake open, you must complete it before you can start a new stocktake.
-
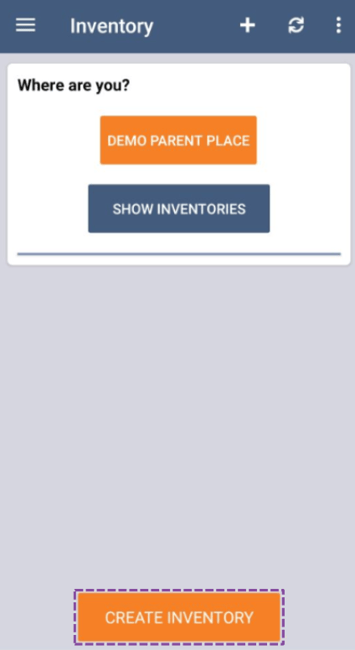
Tap Show Inventories to show all the previous stocktakes performed at the selected location including the currently active stocktake.

-
Select a previous stocktake to view. In this view you can add to the stocktake by tapping Cycle Count or you can tap Resolve to complete the stocktake.


-
Tap View Current to check if there are any


-
-
If there are no open stocktakes, tap Create Inventory to create and start a new stocktake.
-
Performing a Cycle Count
During the cycle count, the main objective is to thoroughly scan the assets in the designated location. The goal is to read all the available RFID tags and stop once you have scanned every tag.
Typically, conducting a stocktake involves performing two sweeps of the location. The first sweep is a quick one to capture as many RFID tags as possible initially. The second sweep is slower and more thorough, aimed at capturing any RFID tags that may have been missed during the first sweep. This two-step process ensures a comprehensive and accurate count of the inventory.
To begin a cycle count, follow these steps:
-
Upon opening a stocktake, you'll be greeted with the stocktake details page which will display details about the expected items to be found during the stocktake.

Found: Lists the number of items that the system currently has recorded in this location when the stocktake was started and was scanned during the previous cycle count. Unexpected: Lists the number of items that the system did not have recorded in this location when the stocktake started, but was scanned during the cycle count. These items are referred to as unexpected as they were not expected to be found at the selected location. Missing: Lists the number of items that the system currently has recorded in this location when the stocktake was started but has not yet been read during the cycle count. Initially, this will be all items as no items will have been counted yet prior to the cycle count stage. - To count tags as part of the stocktake, tap the Cycle Count button.
- The cycle count details page will be displayed, providing a clear view of the RFID tags that still need to be scanned and counted.
Items Expected : Lists the number of items that are expected to be scanned at this location when the stocktake was started. 
Items Seen: Similar to the Found count, lists the number of items that have been scanned and were expected to be scanned at this location when the stocktake was started. Newly Seen Count: Lists the number of expected items that have been scanned during the current cycle count. This number will reset in between each cycle count. New Tags Scanned Count: Lists the number of total RFID tags that have been scanned during this cycle count. These will include RFID tags that do not correspond to an item in the RAMP platform. Items Remaining: Lists the number of remaining expected items that have not yet been seen and will count down to zero as these tags are seen. - To start scanning RFID tags, tap the trigger quickly and the RFID handheld will begin scanning. The RFID handheld will play a starting reading tone and a green reading indicator will be displayed on screen.
- While scanning, you can easily adjust the power level of the RFID reader by tapping the appropriate button. This allows you to switch between High Power and Low Power settings.
- High Power mode enables the reader to scan RFID tags from several meters away.
- Low Power mode reduces the range and can even operate as a contact reader if set to the minimum level of 5dBM.
- If the preset power levels are not suitable, you can also customize the RFID power level by tapping the RFID Icon in the top-right corner.

- During the cycle count, the RFID handheld scanner will emit a beep sound for each new RFID tag it scans. Initially, you will hear multiple beeps as the scanner identifies and scans each RFID tag for the first time. However, as you continue to scan more items, the number of beeps will gradually decrease.
- To stop scanning RFID tags, tap the trigger quickly again and the RFID handheld will stop scanning. The RFID handheld will play a stopping reading tone and the green reading indicator will disappear.
- To save the current Cycle Count to the stocktake, tap the Upload button. You will be prompted to confirm that you have finished. Tap Yes to continue.


- If the Single Scan Mode has been enabled in the settings, the stocktake will automatically move from Processing to Completed and will not require the user to manually complete the stocktake.
The Cycle Count will be uploaded to the server for processing, and you will be directed back to the main home screen. The time it takes to process the upload may vary depending on the size of the cycle count, ranging from a few seconds to a few minutes. The processing will be considered complete once the status of the stocktake changes from "Processing" to "In Progress."
- If the Single Scan Mode has been enabled in the settings, the stocktake will automatically move from Processing to Completed and will not require the user to manually complete the stocktake.
- If the accuracy level is unsatisfactory or if you are counting in stages at the same location, users have the option to perform multiple cycle counts within the same stocktake. To do this, simply open the existing stocktake and follow the same steps as previously shown. This feature allows for greater flexibility and accuracy when managing inventory stock.
Checking the Stocktake
Once you've submitted your first cycle count and processed, the data will appear against the stocktake for us to check and confirm if there are any remaining items that still need to be scanned. To check the stocktake, users will have to use the web portal and view the stocktake.
Completing a Stocktake
- To complete a stocktake, return to the View Current page or of the stocktake that you wish to complete and close.
- To finish the stocktake, simply tap on the Resolve button located at the bottom of the page. A prompt will appear asking you to confirm if you have completed the stocktake. Tap Yes to proceed.


- The stocktake will then be processed and ready to view on the website. Depending on the size of the stocktake, the final processing may take several minutes to complete.