Managing Transfer Orders using Stocky
This article covers how to create, scan, edit, receive and sync stocky transfer orders with Ramp.
Note: Stocky-based transfers are no longer supported. Follow the Transfer Orders with Shopify guide for the updated process when syncing transfers with Ramp.
Transfer orders in shopify stocky are automatically synced to the Ramp Database every 5 minutes.
Creating a Transfer Order
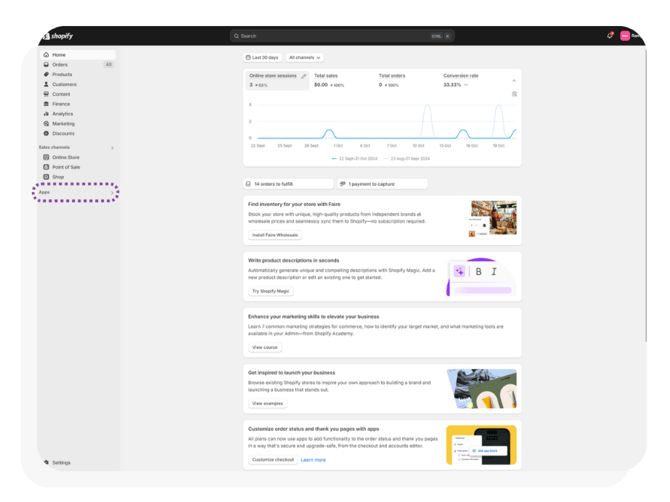
- To create a transfer order start by opening shopify and logging in. Then click Apps in the left bar.
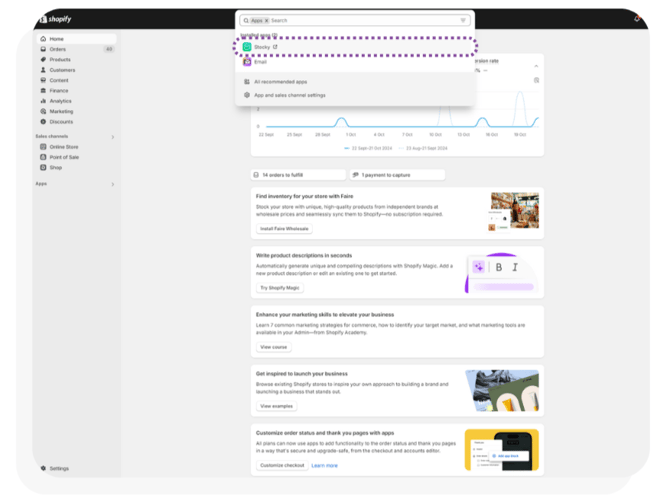
- A popup will appear below the search bar, navigate to and click on Stocky to access the stocky management system.
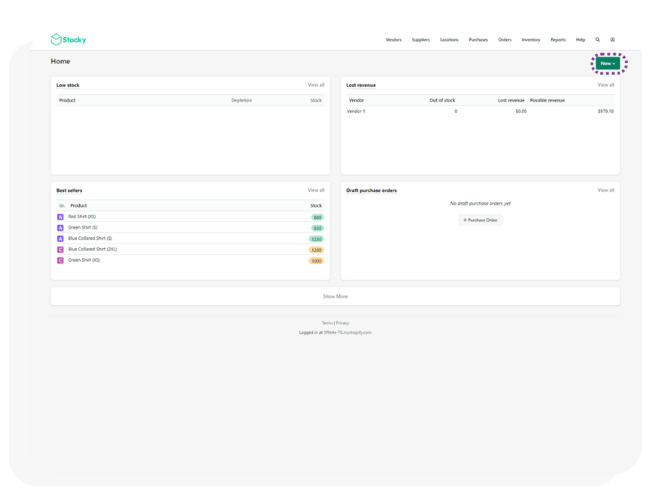
- The stocky app will open. Navigate to and click on New in the top right of the main screen.
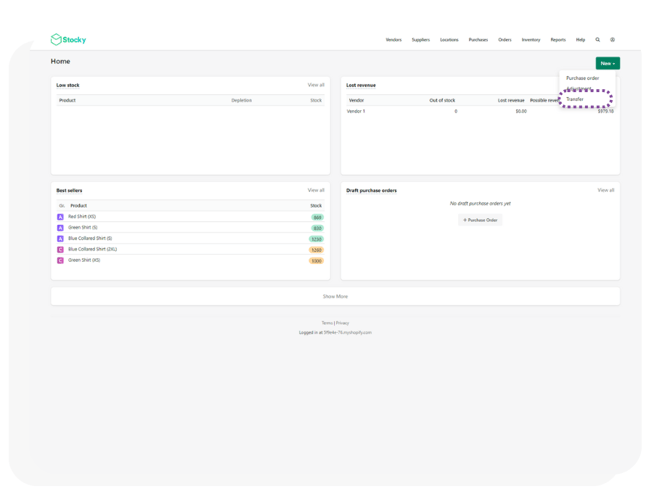
- Click Transfer in the drop down menu of the New button in the top right of the main screen to create a new transfer order (TO).
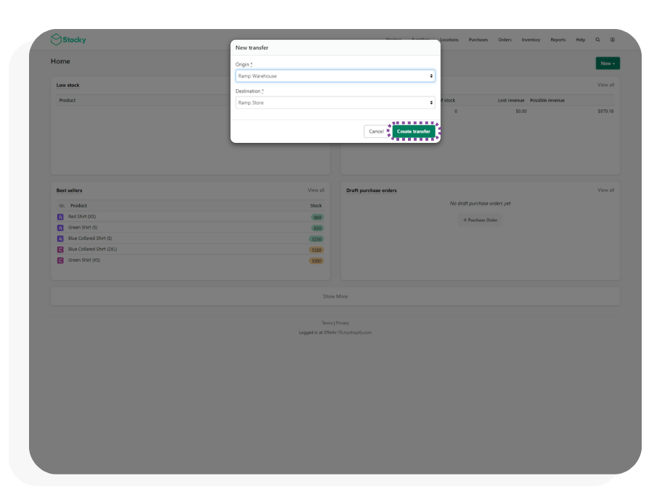
- A popup will appear asking you to input the origin and destination of the transfer order. Once inputted, click Create Transfer to create the TO.
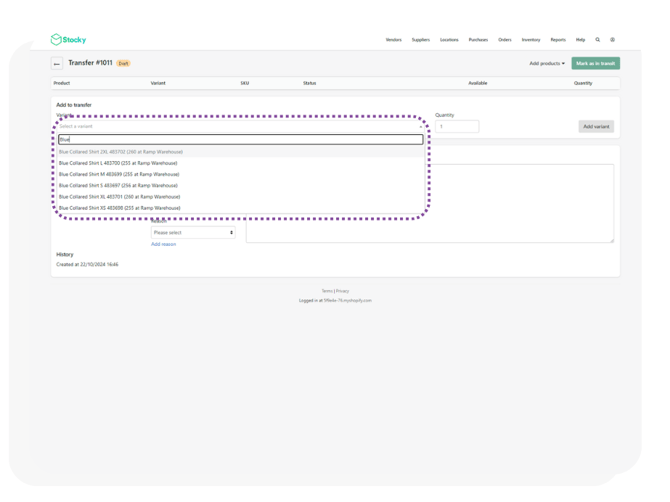
- Once created, navigate to the search bar under Add to transfer and search for the product you want to add to the TO. This product must be searched for, it will not appear in the dropdown menu without searching. Once searched for, click on the product you product you would like to add.
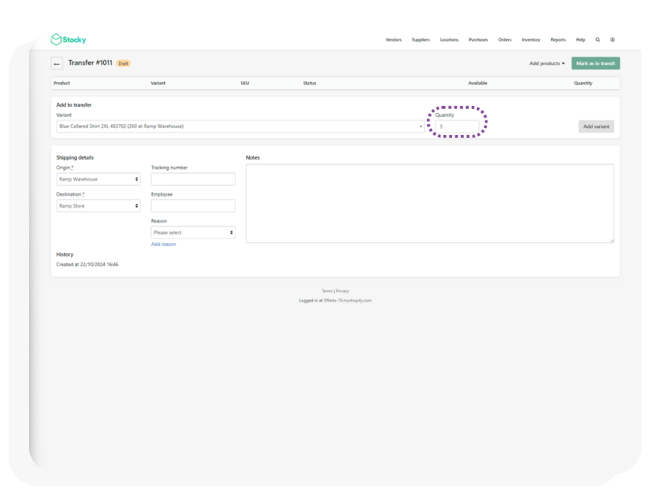
- Once added change the quantity of that product to the right of it. This can be done by either entering in a number or clicking the up and down arrows in the quantity box.
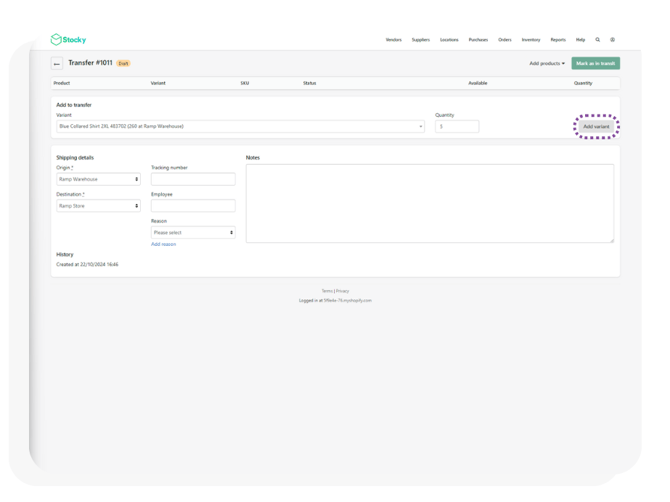
- Once the quantity has been entered, click Add variant to add the product to the TO.
- Add as many products as required, changing their quantity as required.
- Enter in the rest of the details in the purchase order and click Mark as Int Transit in the top right corner of the screen.
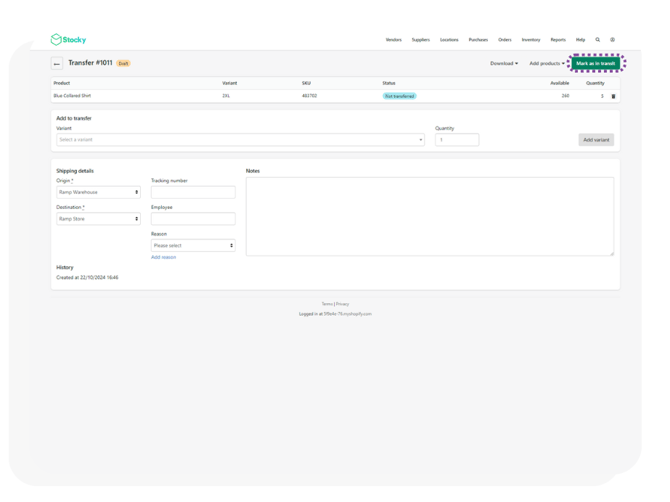
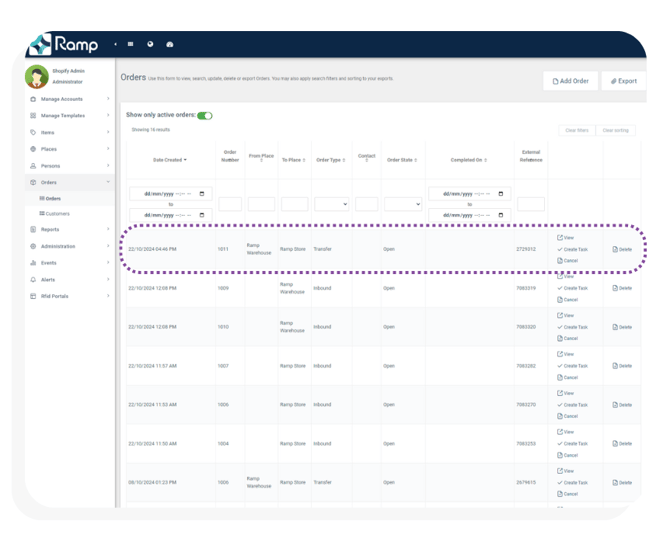
- Once ordered, the TO will be synced to the Ramp database within 5 minutes.
Receiving a Transfer Order
Scanning a Received Transfer Order
Once a TO has been scanned it will not be synced from stocky into Ramp Web. If you want to edit a TO's details in stocky, it must be done before starting to scan or it will have to be manually updated on both systems.
Marking a Transfer Order as Received
Once a transfer order arrives and has been scanned it can been seen on the Ramp Web as scanned. The data collected can then be compared with the original purchase order to see any differences between amounts.
Small Orders
For small orders we recommend using the Ramp Web view of the order to see if there are any differences in quantities. This view doesn't allow for filtering, searching or sorting, making it the preferred view for small orders that require quick viewing. This can be done by:
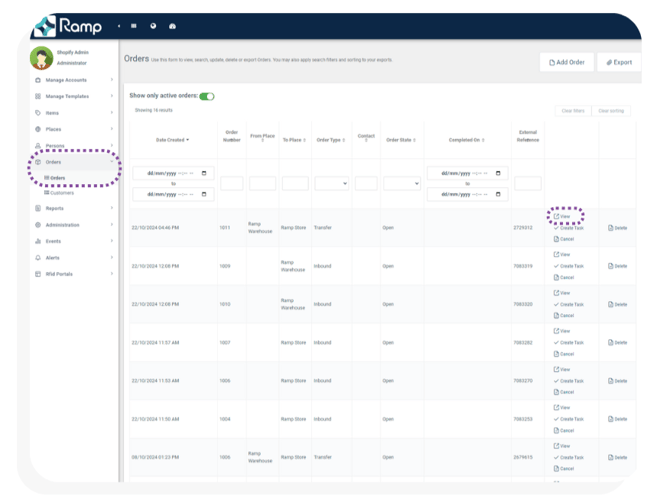
- Log into Ramp Web and navigate to Orders -> Orders in the left menu. Then navigate to the purchase order that has been received (generally identified by the Order Number) and click View on that order.
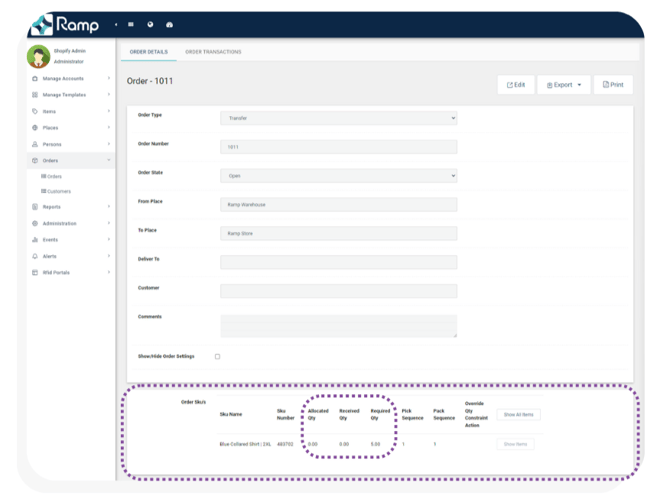
- Navigate towards the bottom of the transfer order view to Order Sku's. This area of the view allows you to compare the order quantity, received quantity and allocated quantity of a product.
Large Orders
For large orders we recommend exporting the order's data as a csv and opening it in Excel to be filtered, sorted and searched. This allows for easier navigation of large transfer orders. This can be done by:
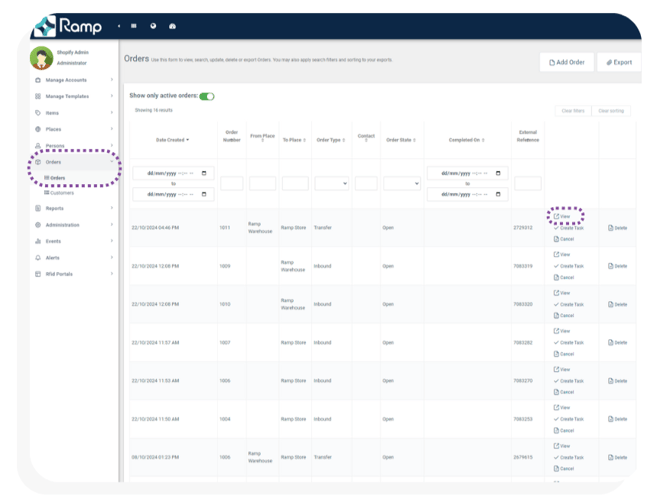
- Log into Ramp Web and navigate to Orders -> Orders in the left menu. Then navigate to the purchase order that has been received (generally identified by the Order Number) and click View on that order.
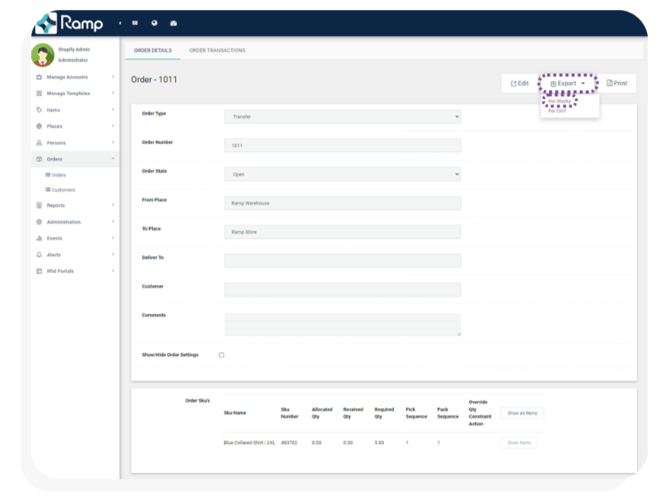
- Click Export and then For Stocky to export and download a csv file of the TO.
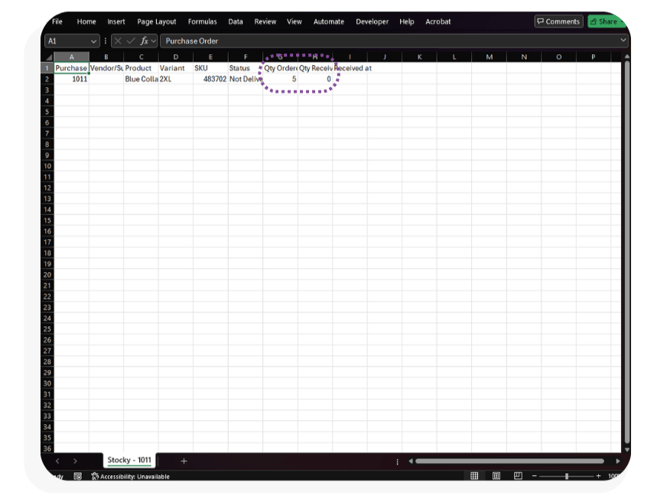
- Open the downloaded file (titled Stocky - <transfer order number>) in Excel. This file shows the quantity ordered and the quantity received and the file can be searched, sorted and filtered using Excel.
Partially Received Orders
Once the ordered and received quantities have been analysed, if there was a discrepancy in the quantities, the order can be marked as partially received, meaning that there were some items that cannot be used or were not in the order. To do this:
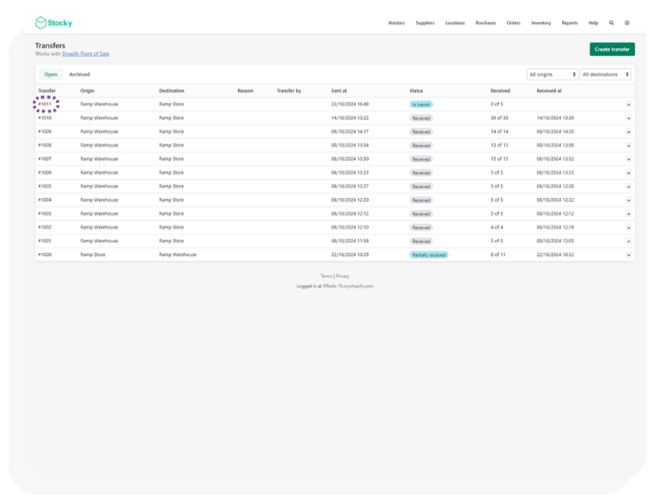
- Navigate to the transfer orders page in Stocky through Inventory -> Transfers.
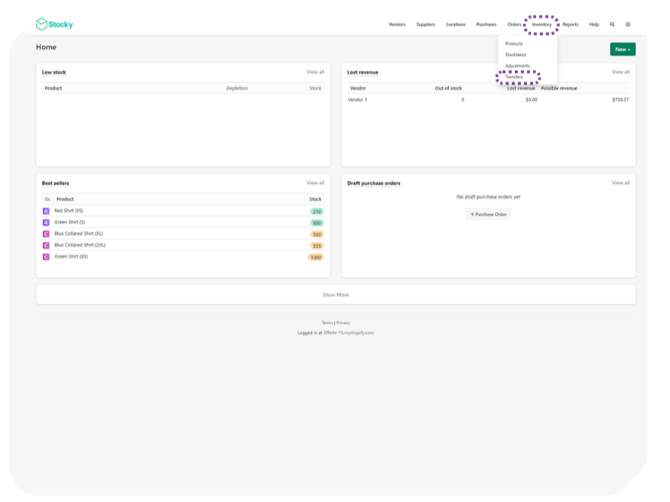
- Click on your transfer order to view it.
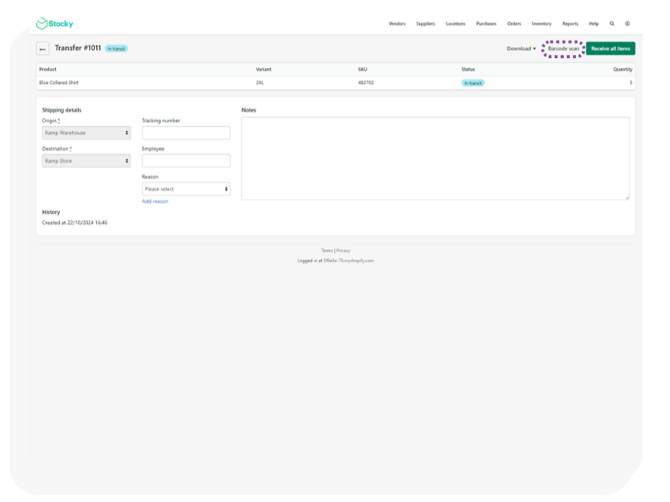
- Click Barcode Scan to mark items as partially received.
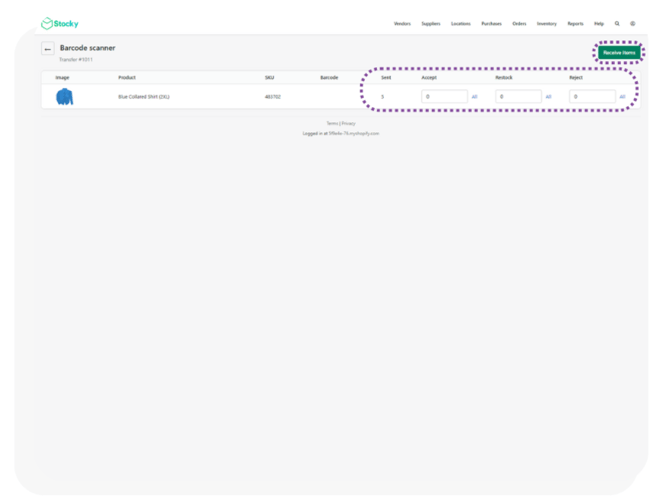
- using the Accept, Restock and Reject columns, items can be marked as received using Accept, as needing to be resent if they are missing/ damaged using Restock or rejected if they were not wanted in the order using Reject. Once the items are marked correctly, click Receive Items to mark the transfer order as entered.
- The Item will then be marked as partially received and the missing amount will be put on back order automatically.
Fully Received Orders
Once the ordered and received quantities have been analysed, if there was not discrepancy between the ordered and received quantities, then the order is fully received and must be marked as such. To do this:
- Navigate to the purchase order in Stocky and ensure all the items in the order are all selected. Once selected, click Receive Selected in the top right of the screen.
-png.png?width=670&height=503&name=Ramp%20Knowledge%20Base%20Images%20(1)-png.png)
- All the items in the transfer order will be marked as received.
If some of the items are fully received and some are partially received, follow the previous methods per item and only select the items that have been fully received before clicking Receive Selected.