
Picking a sales order means scanning the items that are leaving your store for a customer, so the order can be dispatched. Each tag you scan counts against its line on the order.
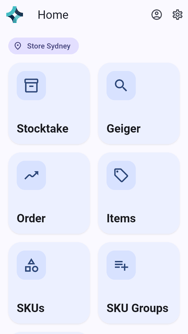
On the home screen, tap Order to see the order lists. Orders are split into three lists by where the stock is going:
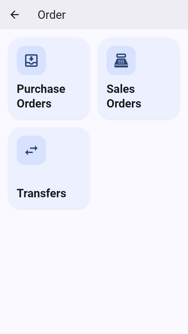
| List | What it holds | What you do here |
|---|---|---|
| Purchase Orders | Stock bought from a supplier, on its way to your store. | Receive it when the delivery arrives. |
| Sales Orders | Stock sold to a customer, leaving from your store. | Pick the items, then the order is dispatched. |
| Transfers | Stock moving between your own stores and warehouses. | Pick at the sending place; Receive at the place it arrives. Switch between the two at the top of the list. |
Each list shows only the orders that your store can work on now.
Some orders require exact quantities: every line must have exactly the number ordered, no more and no fewer, before the order can finish. On these orders, a line that is short or over shows as an error until it's right. The example below is an exact-quantity order.
Open the Order
On the home screen, tap Order.
Tap Sales Orders.
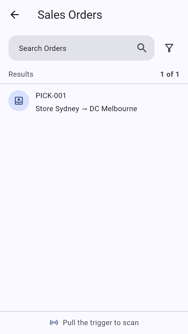
Tap the order you want to pick. Orders ready to pick from your store are listed, each with where it goes. To find an order, search by order number at the top.
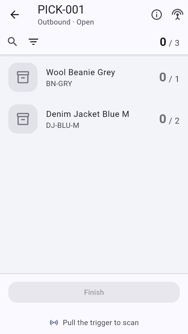
The order opens. Each line shows the item and scanned / ordered, for example 0 / 2.
Scan the Items
Click the trigger to start reading.
Scan the items. Each tag counts against its line. Lines that are still short are tinted and marked with a ↓ arrow. While the reader is reading, Save and Reset are greyed out.
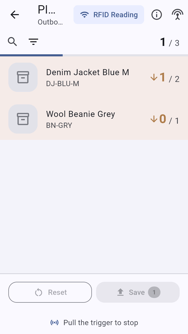
Keep scanning until every line reaches its quantity. Lines that are done turn green.
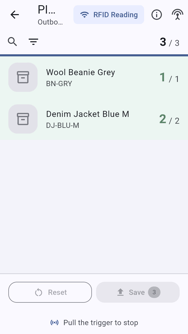
Click the trigger again to stop.
Check for Errors
If anything is wrong, Errors shows with the number of problems, in place of Save. In this example, one jacket too many and a tag that isn't on the order were scanned.
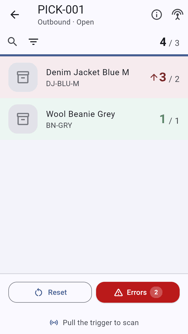
Tap Errors to open Order Errors, which lists each problem.
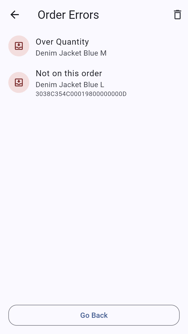
Fix each problem. See How to Fix Order Errors.
Save and Finish
Back on the order, with every error fixed, tap Save.
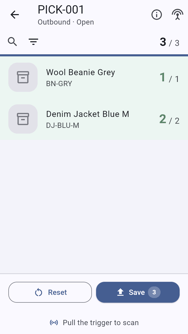
Wait for Your progress was saved. This confirms the scans are on the order.
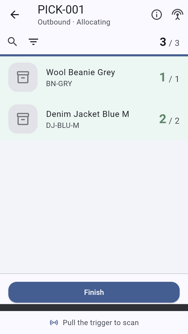
Tap Finish. On an order that doesn't require exact quantities, the app asks you to confirm if items are still missing, because they won't be picked.
The order is processed and the result shows, for example Dispatched.
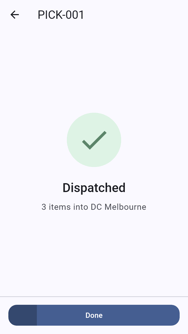
Tap Done.
You can save as often as you like and come back later. Saved scans stay on the order.